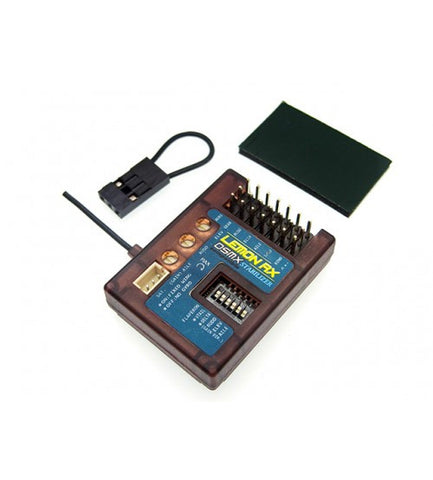
Lemon Rx DSMX Compatible 7-Channel With Stabilizer (Top Pin) (DSM2 Backward Compatible)
Lemon Rx DSMX Compatible 7-Channel With Stabilizer (Top Pin) (DSM2 Backward Compatible)
Specification
| Type: | Stabilizer with DSMX Compatiable 7-Channel Full Range Receiver (Top Pin) |
| Number of Channel: | 7 |
| Modulation: | DSMX Compatible (Also DSM2 backward Compatible) |
| Band: | 2.4 GHz |
| Dimension: | 37(L) x 28(W) x 9(H) mm |
| Weight: | 7.84g |
| Voltage Range: | 3.45 - 7.2V |
RCgroups discussion
http://www.rcgroups.com/forums/showthread.php?t=2164243
User Manual re-direct link (Thanks to John [JJ604 RCgroups] in helping us with this user manual.)
http://www.lemon-rx.com/index.php?route=information/information&information_id=7
Highlight
- 7-Channel receiver when stabilizer is disabled. (AUX2 located at bind position)
- Supports Flaperon by switching J6 to on position while setting the Spektrum transmitter wing type as Flaperon
- Gear channel for remote stabilizer on/off
- Remote master gain on-the-fly adjustment on AUX3.
Using the stabilizer as 7-Channel Receiver
- Turn off J1 to J6
- Follows normal binding procedure by inserting bind plug to the bind location and enable binding on transmitter
- Bind location will become the 7th channel. Use ESC with BEC on throttle channel for supplying power to servo.
Understanding the Lemon Rx stabilizer

Install location of Lemon Rx stabilizer

Direction of servo movment with changes in direction when stabilizer is enabled

Setup Instruction
Step 1 - Glue your stabilizer alone the C.G. Flipping your gyro for the required installation is also OK.
Step 2.1 - (No Flaperon for Fixed Wing/ Delta / V-Tail) Disable any mixing on you Spektrum transmitter and choose the correct wing type by setting J4 and J5.
Step 2.2 - (Flaperon for Fixed Wing) Disable any mixing and enable Flaperon on Spektrum transmitter. J4, J5 and J6 at on position.
Step 3 - The stabilizer already has a build-in Spektrum compatible receiver and will work without satellite. Insert bind plug to bind location and power on the unit. LED indicator will flash quickly. Turn on your transmitter to bind mode for binding. If binding is successful the LED indication will stop flashing and become solid.
Step 4 - Sub-trim and set stick directions with Spektrum transmitter on all channels as necessary. Upon trimming, toggle Gear switch twice in 1 second allows stick centering detection which is required for optimizing the stabilization. Gear switch is used to switch between manual or stabilization control Green + red LED indication means no stabilization while solid green means stabilization is enabled. If Aux3 is available on your transmitter, remote master gain tuning for all 3 channels will become available. However, during setup AUX3 should be in its center position.
Step 5 - Adjust the 3 potentiometers to 50% and check the gain direction. Ensure your Gear is set to enable gyro with gain = 1 on AUX3 (if available). Rotate the plane in all 3 axis and adjust J1 to J3 as necessary for gain direction changing. Ensure the servo moves the wing as shown in the earlier diagram for proper correction. Adjust the individual gain as necessary.
Step 6 - Ready to start flying! Remember to check Gear, AUX3 and proper gyro correction for all 3 axis just before you flying your plane!
Note:
1) This is not a Spektrum DSMX or DSM2 product, nor is it a copy of a Spektrum DSM2 or DSMX product. The Spektrum, DSMX and DSM2 brand is a trademark of Horizon Hobby, Inc.
2) This is not an underground black market fake Spektrum product. Lemon Rx quality is guaranteed.
3) Lemon Rx products are tested to be compatible with Spektrum's DSMX and or DSM2 product (Spketrum, DSMX and DSM2 are the registered trademark of Horizon Hobby, Inc.).
We Also Recommend